A well-designed patio or walkway can completely transform your outdoor space. Whether you’re dreaming of a backyard oasis or simply want a neat, functional path through your garden, learning how to lay pavers using sand and stone is a DIY project worth considering. With the right materials, proper preparation, and some elbow grease, you can achieve a beautiful, long-lasting result—no contractor required.
At Kirk Allen Landscape Supply (973-347-3117), we supply everything homeowners and landscapers need for hardscaping projects across New Jersey—from high-quality stone to the perfect base sand. In this step-by-step guide, we’ll walk you through how to install pavers using sand and stone the right way.
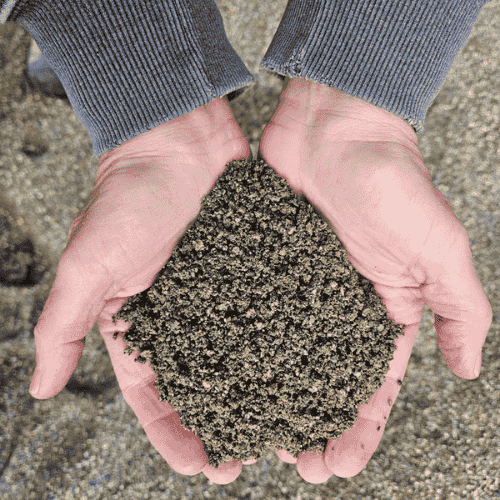
Why Use Sand and Stone for Paver Installation?
Using the correct base materials is critical when laying pavers. Sand and crushed stone work together to create a stable, level foundation. Here’s why they matter:
- Crushed Stone (Base Layer): Acts as a load-bearing foundation that supports the weight of the pavers and traffic.
- Sand (Bedding Layer): Allows for minor adjustments and locks the pavers in place when compacted.
Skipping or skimping on either of these can lead to uneven surfaces, shifting pavers, and drainage issues down the road.
Tools & Materials You’ll Need
Before you get started, gather these tools and materials:
Materials:
- Crushed stone (¾” or quarry process – available at Kirk Allen)
- Coarse sand (such as concrete sand or bedding sand)
- Pavers of your choice
- Edging restraints
- Polymeric sand (for joints)
- Landscape fabric (optional)
Tools:
- Shovel
- Wheelbarrow
- Rake
- Tamper or plate compactor
- Level
- Rubber mallet
- String and stakes
- Garden hose or broom
Step-by-Step: How to Lay Pavers Using Sand and Stone
1. Plan and Mark the Area
Start by sketching out your project on paper and measuring your space. Use stakes and string to outline the area where you’ll lay the pavers. A square, rectangle, or circular design can all work—just be sure the layout is functional and accessible.
Tip: Add 6–12 inches to your project size for edge restraints and working space.
2. Excavate the Area
Using a shovel or rented excavation equipment, dig to a depth of about 7–9 inches for pedestrian pavers, or deeper for driveways. The depth depends on:
- 4–6 inches of crushed stone (base)
- 1 inch of sand (bedding)
- The thickness of your pavers (usually 2–3 inches)
Ensure the ground is graded slightly away from your home for drainage (a slope of about 1 inch every 4 feet).
3. Lay Landscape Fabric (Optional)
If you want to reduce weed growth and improve stability, roll out landscape fabric over the excavated area before adding your base stone.
4. Add the Crushed Stone Base
Spread a 4–6 inch layer of crushed stone evenly across the area. Use a rake to level it, then compact it using a tamper or plate compactor.
Pro Tip: Compact in multiple passes, adding stone in 2-inch layers. A well-compacted base prevents shifting and sinking later on.
5. Add the Sand Bedding Layer
Next, spread about 1 inch of coarse bedding sand. Use a screed board (a straight piece of wood or metal) to level the sand. The surface should be flat but not compacted.
Avoid using fine play sand—it’s too soft and won’t provide proper support.
6. Lay the Pavers
Start laying pavers in one corner of the area, working your way out in a consistent pattern (e.g., running bond, herringbone, basketweave). Place pavers tightly together to minimize gaps.
Use a rubber mallet to tap each paver into place. Check regularly with a level to ensure consistency across the surface.
7. Install Edge Restraints
Install edge restraints along the perimeter to lock the pavers in place and prevent spreading over time. This is essential for maintaining your pattern and structure.
8. Compact the Surface
After all the pavers are in place, run the plate compactor across the surface to help the pavers settle into the sand layer.
Note: Place a mat under the compactor to avoid scratching the surface of the pavers.
9. Sweep in Polymeric Sand
Pour polymeric sand over the surface and use a broom to sweep it into the joints between the pavers. Then, lightly mist the surface with water to activate the sand, which will harden and lock the pavers in place.
Avoid overwatering—it can wash away the sand.
10. Enjoy Your New Hardscape!
Let the surface cure for at least 24 hours before walking or driving on it. After that, your patio, walkway, or driveway is ready to enjoy.
Where to Buy Sand and Stone for Paver Projects in NJ
At Kirk Allen Landscape Supply, we carry a wide variety of:
- Crushed stone for base layers
- Bedding sand and polymeric sand
- A large selection of natural and manufactured pavers
- Delivery options available throughout Northern NJ
Whether you’re building a walkway in Hackettstown or a patio in Raritan Township, our team is here to help you get the right materials at the right price.
📍 Visit us at: https://www.kirkallenlandscapesupply.com/
📞 Call us at: 973-347-3117
Final Thoughts
Installing pavers with sand and stone isn’t just for pros—it’s a manageable DIY project when you follow the proper steps. Taking the time to prepare your base, choose quality materials, and work methodically will result in a stunning, durable outdoor surface that adds value and beauty to your home.
If you’re ready to begin, give Kirk Allen Landscape Supply a call or stop by—we’re always happy to offer advice and load you up with exactly what you need.
